

We own a 3 bedroom home and our two boys have always had their own rooms. This has mainly been for convenience with their different schedules; nothing worse than a newborn waking up a two year old multiple times a night! Although we have the space for them to have separate rooms, we always planned that when they were old enough the boys would move into the same room to learn sharing and cooperation. Davis turned 3 in December and Becker is nearly 6, so the time had come! They have new bunk beds and they are honestly enjoying the shared space.
This meant Jason and I could finally have a home office! I’ll be doing a later blog on the entire remodel of the space but for now I wanted to share with you how I DIY-ed some of the artwork for the space.
I knew I wanted to go with a shabby chic farmhouse theme in the room to really inspire us in our endeavors. I found two fabulous original barn paintings in frames at Goodwill for only $3.99/each a few months back. I also recently scored an amazing large antique window at Habitat for Humanity Restore that was on sale for only $5!? I decided to paint them all and then distress them to help tie the room together. I’m going to show you how easy it is to accomplish this look.
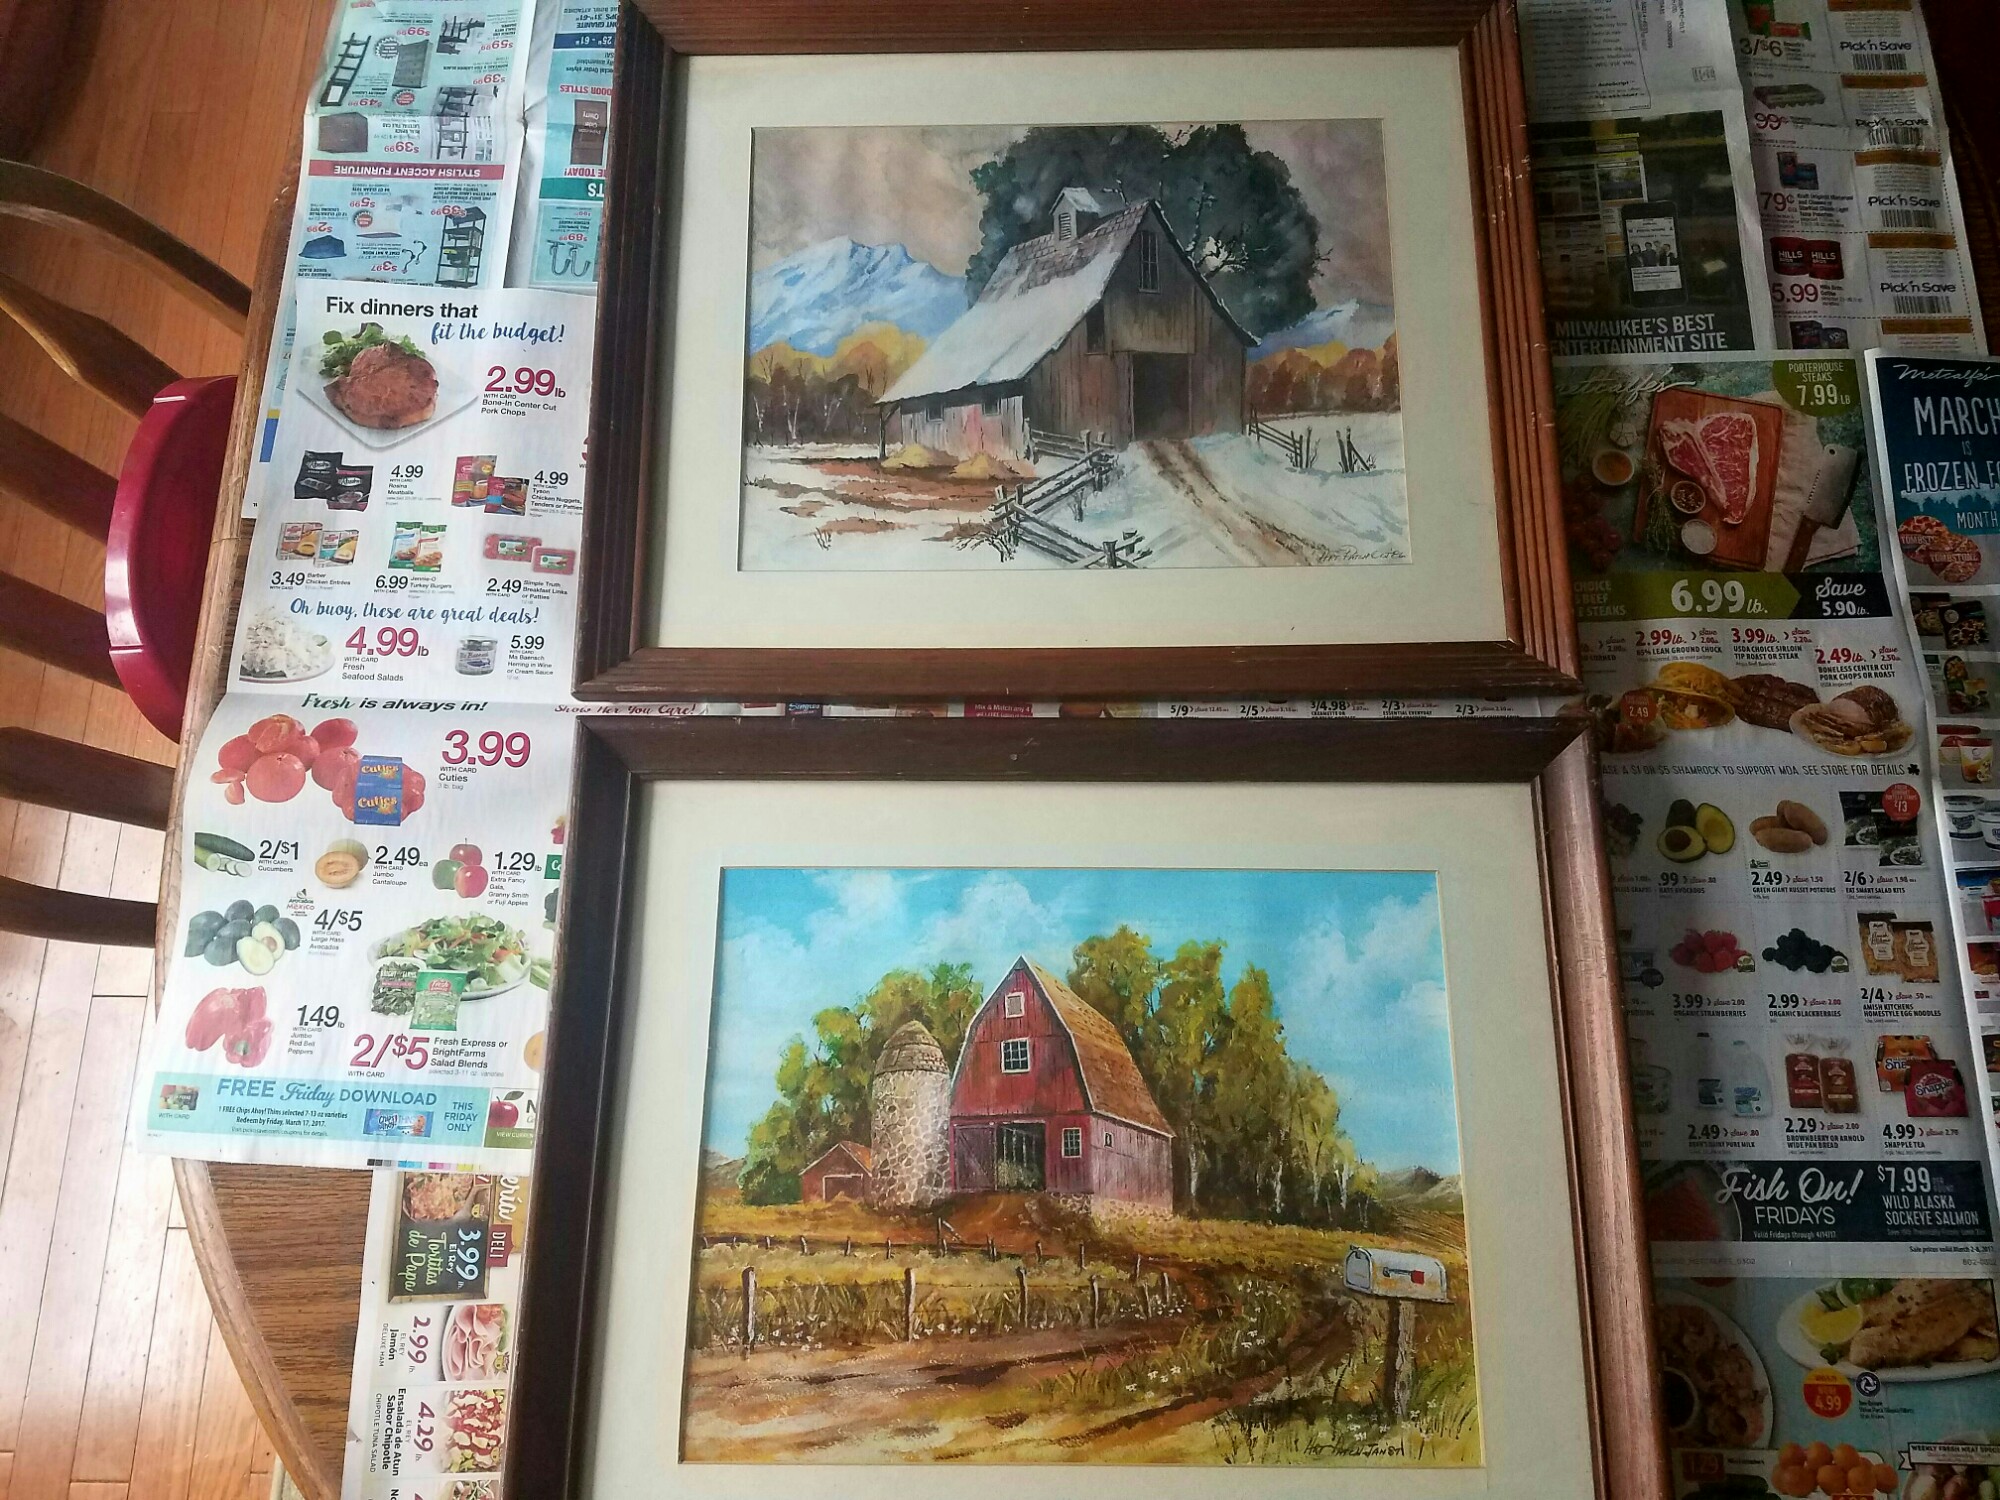
First, the barn paintings. Here they are in the original wooden frames. The frames had several nicks in wood, which added to their character and I knew would add to the authenticity of the pieces once distressed.

The older frames appear to be handmade and held the pictures in with small nails. For these reasons I decided not to remove the pictures to distress the frames. If your frames are modern and the pictures are more easily removed, I recommend doing so.

My solution was to use blue painter’s tape on the borders of the glass.

I chose to use paint that I had on hand, rather than going out and buying some when such a small amount is needed. Any small paintbrush will work, but I personally prefer sponge brushes for applications like this because of the angled tip.

Then start painting. Because you will be distressing it, it needs not be perfect! It’s a great opportunity to get the kiddos involved – with supervision, of course.

I recommend two coats of paint. I found the paint only needed to dry about one hour between coats.

I tried two different methods to distress the white paint after it was fully dried; steel wool and sandpaper. I found the steel wool to be a slow and arduous process for not a lot of results. I personally preferred the sandpaper. It was a quicker method and made the final product look rougher and more authentic. I highly recommend using work gloves for either method you choose!

Here you can see the difference between the distressed frame and one that is painted. I would say to start small with the distressing and go from there. I actually held the frames up to the painted walls several times during the process so I knew they would be the perfect amount. In total, each frame only took about 15 minutes to get the desired look.

And here are the pictures hung up in the office! They really help anchor this area and help to define the space! I love how they turned out, especially with the white against the lavender walls!

Next up, the antique window. It’s obvious that someone previous to me purchased the window and tried to refurbish it themselves. They painted it pink and started distressing the outsides.

They did leave the inner frames alone, however, and I was very happy about that. The inner frames have the original paint with the chippy patina, and I was determined to keep that integrity of the piece.

I started by repainting the outside white. Again, two coats of paints were needed. I chose not to tape the window off because I didn’t want to disturb the original paint on the inner framing.

I started by hand-sandpapering as I had with the picture frames. Being that the window is a much larger piece it was taking a very long time to get anywhere. I wanted some of the new white paint, some of the pink paint, some of the original paint, and then some of the wood all to show, and getting through all of those layers by hand took a lot of time.

So, I employed my husband to break out the electric sander. It became a very quick process. If you are not going through several layers like I was, I would recommend sticking to doing it by hand as you have more control. However, this process worked well for me to expose all the layers that I wanted.

Use a clean sponge with a small amount of water to wipe off the mess when you are satisfied with the result. This will make clean-up a breeze.

And the final product of the antique window! Yes, that is even the original hardware peeking through on the bottom of the frame. I originally planned to use it as a picture frame, but once I was finished I was so happy with final product that I thought photos would make it look busy and take away from the charm, instead of letting the piece speak for itself. I decided it would be fun to dress it up with the season changes and to keep it simple. I found this adorable banner at Target for only $3 – another score! And it just screams spring to me!
Because I used paint and sandpaper I had on hand, the total investment for the pictures was the $8 purchase price, and for the window was the $5 purchase price and the $3 banner; for a total investment of only $16! The definitely sounds like farmhouse style on a homestead budget to me!

What an easy and great looking project! And how NICE that you’re going to have an office space!! 😀
LikeLiked by 1 person
Thank you! It was fun to do as well 🙂 This was the first blog I was able to write in the office, and I definitely enjoyed the quiet space!
LikeLiked by 1 person